
Introduction:
Knowing how to spell words correctly all the time can be tricky, and finding a spell checker that works well and catches every error can be complicated. That’s why in this article we are going to be using Python to create a simple spell checker that will let you know exactly how to spell a word the correct way. Whether you are new to Python or have some prior experience, this project is a great way to learn more about making functional programs and helps you apply your knowledge in a practical and fun way. Simple and fun projects like this make great beginner Python projects for kids.

Who is this Project For?
This is an intermediate-level project for those who are new to Python. At this point, you should already know the basics of creating functions and creating simple GUIs (graphical user interfaces) with Tkinter, as well as have some basic experience using modules such as TextBlob. These are the concepts that you will use and build upon as you code this project.
What Will We Learn?
This spell checker project focuses on using the Tkinter and TextBlob libraries to create a functional spell checker. Throughout the project, you will learn about creating functions and buttons to make a functional project, as well as learn how to use the TextBlob module to correct misspelled words. This project is a great way for kids to learn how to create simple Python projects, as well as familiarize themselves with libraries, functions, and creating Tkinter GUIs.
Features to Consider:
- Users can enter a misspelled word into the program.
- When the correction button is pressed the word will be corrected and displayed in another text box.
- The user can press a clear button to clear all text and enter a new word.
Main Steps:
This project can be broken down into 4 main steps:
- Import and setup modules
- Create the main Tkinter GUI
- Define the Correction and Clear functions
- Create the GUI’s Correction and Clear buttons
Step 1: Import the Modules:
The first step we will need to do is import the Tkinter library and the TextBlob module into the program. This will let the program know that we will be using them. The code for this step will look like this:
Step 2: Create the main Tkinter GUI
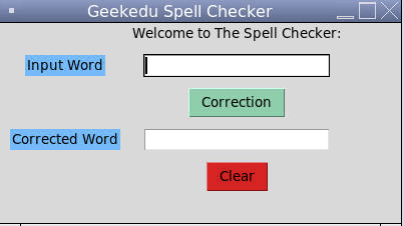
Now that all of the modules have been imported, it’s time to create the program’s graphical user interface. This will involve setting up the canvas and its dimensions, titling the window, and adding a label describing what the program does. To begin, we’ll initialize Tkinter and create the window. Our window will be 400x200 pixels so we'll set these as the dimensions. We will also title the window so that users know exactly what it’s called. In this case, we’re titling the window “Geekedu Spell Checker”. This is the name we’ve chosen to use for this example, but you’re free to use whatever name you like. After this is done, the code will be:
Next, it’s time to create labels for the GUI, as well as create the text input boxes. We’ll start by creating a label to let users know what the program does. To do this, we will create a label that says “Welcome to the Spell Checker:” and place it at the top center of the window. We will also create two other text labels, one that says “Input Word”, and one that says “Corrected Word”. These will let the user know what each text box is for. The code for this step of the project will be:
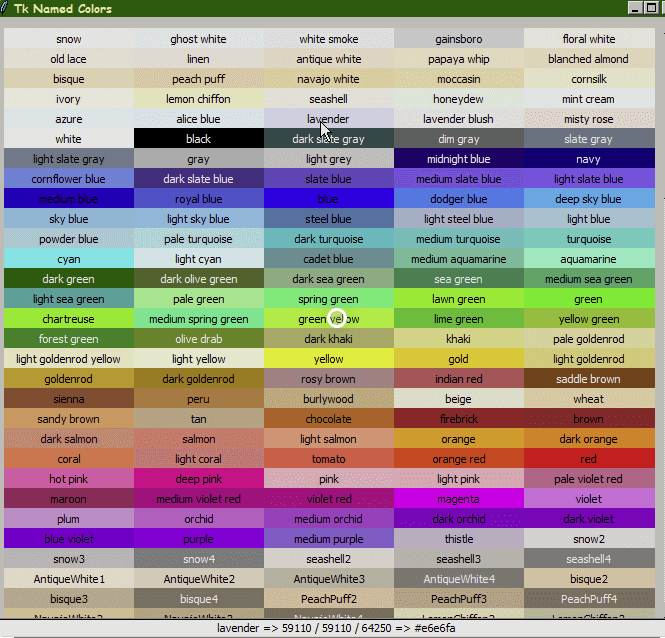
Hint: Notice that in this example we’ve added text and also have sections of code to adjust both the text and background colours. Feel free to experiment with these to make the GUI look however you like!
Next, we need to position the labels in the GUI. TO do this, we will use a grid format. The description will be in row 0, column 1, the input label will be in row 1 column 1, and the corrected word label will be in row 2 column 1 with a padding of 10 pixels on each side. This code should look like this:
Now that the labels for the GUI are complete, it’s time to add the text input boxes. To start, we’ll create a text box where users can type their misspelled words and a text box where the correct spelling of the word will be displayed. This element will be created by typing the variable name, followed by an equal sign and Entry(). This will create a text box that users can type in. Then, we’ll use the same formatting as before to properly position the boxes. Once this step is complete, the code will be:
Once this step is complete, the main GUI is finished and it’s time to move on to code the main correction and clear functions of the program.
Step 3: Define the Answer Function
Now we’ll move on to create a clear function. This function will clear all input from both of the text boxes that were just created. It will be used when the user needs to clear previous words before entering the next value. All we need to do for this function is define it, then delete the entire word from the text box using the .delete method. The first section of code for this step of the program will look like this:
Next, we need to create a function to correct the misspelled word. Start by defining the function and creating a variable to get the word from the text box. Then, we’ll create a TextBlob object and call a method to return the correctly-spelled version of the input word. Finally, we’ll insert the correct word into the text box and the function is complete! At this point, the code for this step will be:
Step 4: Create the GUI’s ‘Download’ Button
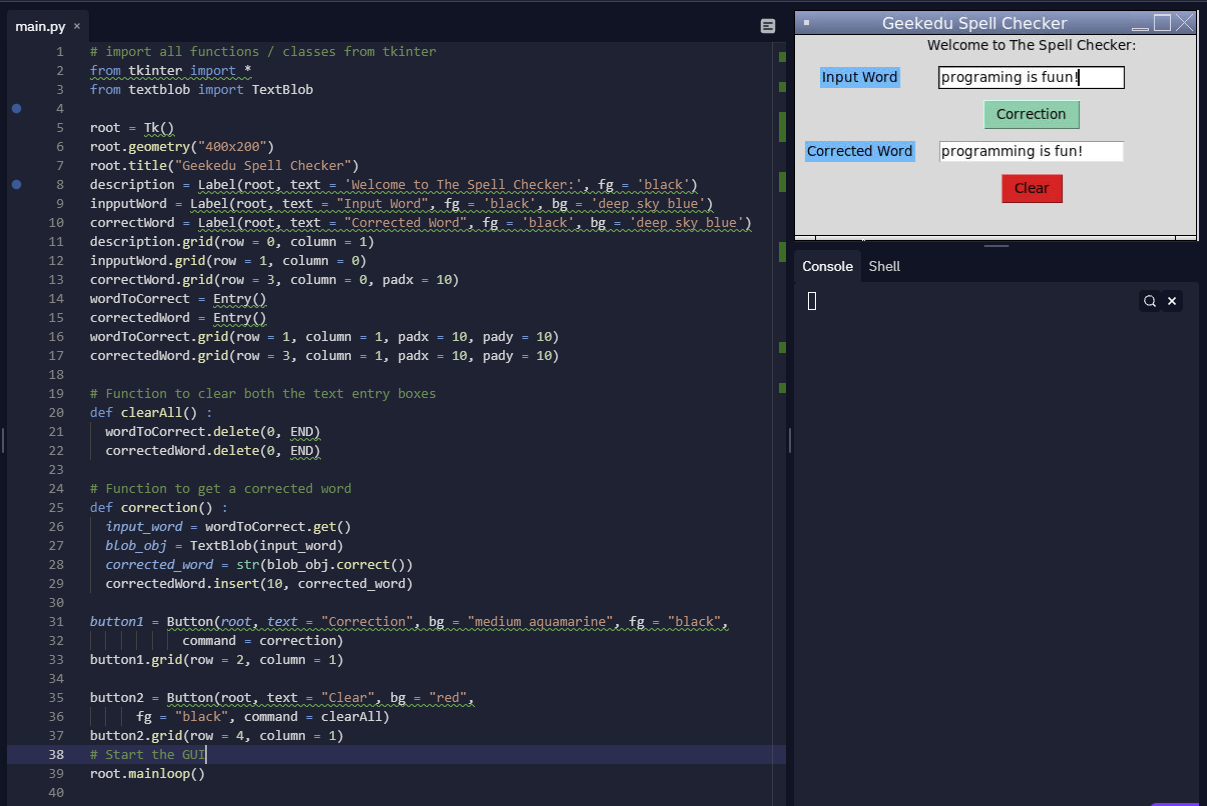
Finally, we just need to add the ‘Correction’ and ‘Clear’ buttons to the GUI, as well as a line of code to run the whole project. We will use the same basic formatting as was previously used for the labels and input box to create a button. Each button’s code will include information about the button such as the background colour, text colour, and what function the button triggers.
Finally, we will use the root.mainloop() command to set up the program and allow it to be run. This command will essentially run the Python file and loop it forever, which means the program will always run. Once this final step is complete the code will look like this:
Hint: Notice that the buttons were also formatted using the grid structure from earlier. The correction button was placed in row 2 column 1, whereas the clear button was placed in row 4 column 1. Feel free to experiment with the placement of these buttons to place them wherever you like!
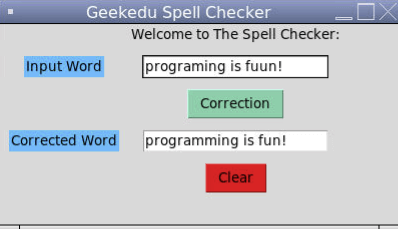
Project Complete!
And now the project is complete! At this point, you will be able to enter any word into the first text box and the program will show you how it should be spelled correctly. Hopefully, you’ve enjoyed this intermediate Python tutorial for kids, and if you’re stuck on any part of the project or have any issues with your code, try reviewing it again either in your text editor or by looking at the code mentioned above as a reference. Python class for kids
.png)


