
Introduction:
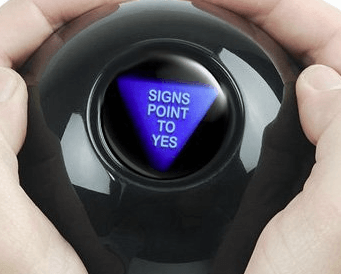
The Magic 8 Ball is a classic childhood toy that is often used as a fun question and answer game. The ball displays an affirmative, negative, or non-committal response when shaken, so kids will often ask a question, shake the ball, and see what the response is.
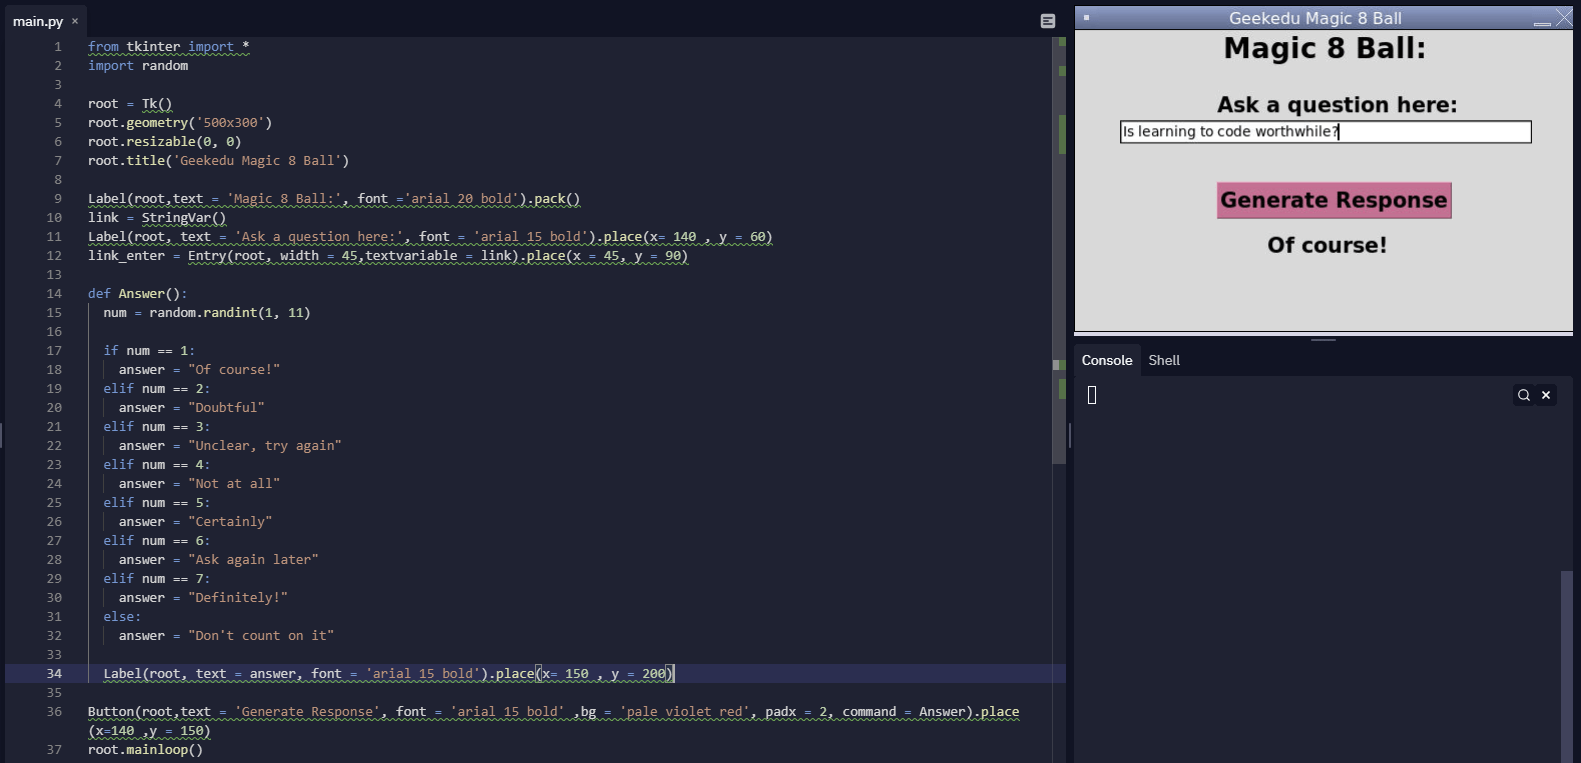
That’s why in this article we are going to be using Python to create a virtual Magic 8 Ball that will let players type a question into the question box and then generate a random answer. Whether you are new to Python or have some prior experience, this project is a great way to learn more about making functional programs and helps you apply your knowledge in a practical and fun way. Simple and fun projects like this make great beginner Python projects for kids.
Who is this Project For?
This is a beginner-level project for those who are new to Python. At this point, you should already know the basics of creating functions and creating simple GUIs (graphical user interfaces) with Tkinter. These are the concepts that you will use and build upon as you code this project.
What Will We Learn?
This Magic 8 Ball project focuses on using the Tkinter library to create the program’s GUI, as well as the random module to randomly select an answer to display to the user. Throughout the project, you will learn about creating functions, labels, and buttons to make a functional project.
Features to Consider:
- The player can enter any question into the text box
- The program will randomly generate and display an answer
- The program should only display the answer after the user presses the “Generate Response” button
Main Steps:
This project can be broken down into 4 main steps:
- Import and setup modules
- Create the main Tkinter GUI
- Define the Answer function
- Create the GUI’s ‘Generate Response’ button
Step 1: Import the Modules:
The first thing we’ll need to do is import all of the libraries and modules that we’ll be using for the project. Because the Tkinter library is non-native, it must be installed and imported to the computer before being used. The first step we will need to do is install Tkinter on the device. To do this, you can open the command line on your computer and type the command:
Now that the libraries have been set up, it’s time to import the Tkinter library and the random module into the program. This will let the program know that we will be using them. The code for this step will look like this:
Step 2: Create the main Tkinter GUI
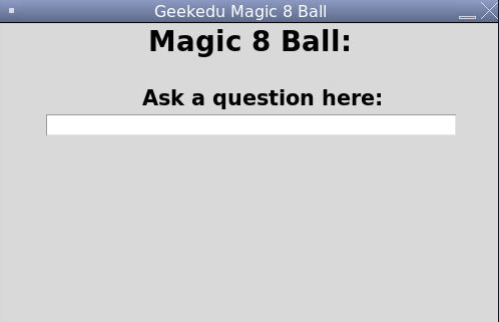
Now that all of the modules have been imported, it’s time to create the program’s graphical user interface. This will involve setting up the canvas and its dimensions, titling the window, and adding a text input box. To begin, we’ll initialize Tkinter and create the window. Our window will be 500x300 pixels so we will set these as the dimensions. After this is done, the code will be:
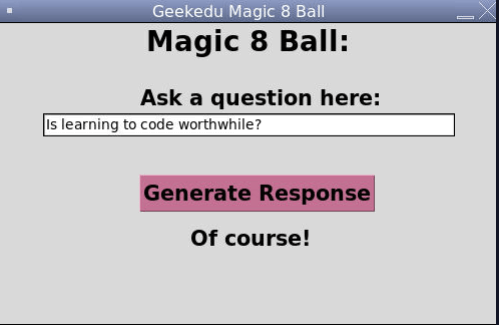
Now we’ll need to set up the window so that it cannot be resized. This will prevent the elements such as titles, buttons, and text inputs from being shifted around and resized. We will also title the window so that users know exactly what it’s called. In this case, we’re titling the window “Geekedu Magic 8 Ball”. You’re free to name the project window whatever you’d like, but make sure the name is clear and easy to understand! Once this step is complete, the code should look like this:
Next, it’s time to create labels for the GUI, as well as create the text input box. We’ll start by creating a label to let users know what the program does. To do this, we will create a label that says “Magic 8 Ball” and place it at the top center of the window. Underneath, we will also create another label that says “Ask a question here:” to let users know where to insert their question. The code for this step of the project will be:
Hint: There is a set format that is used for creating labels with the Tkinter GUI. The format is as follows:
Label(root, text = 'Add Label Text Here', font = 'font font size style').place(x= X-coordinate , y = Y-coordinate). Note that any section in bold will be replaced with the desired text, format, or coordinates for the label.
Now that the labels for the GUI are complete, it’s time to add the text input box. To start, we’ll create a variable called “question”, and set it to a blank string variable.
Hint: This will let the program know that the text entered into the text box will be a string, and the computer can take this information and store it as a variable.
Next, we’ll create a text box where users can ask their question. This element will follow a very similar format to the labels we created earlier, and in the end, the code will look like this:
Once this step is complete, the main GUI is finished and it’s time to move on to code the main download function of the program.
Step 3: Define the Answer Function
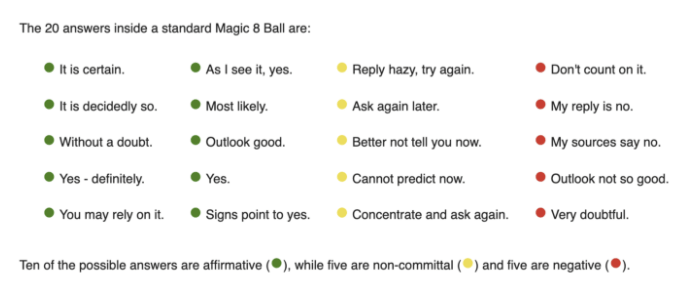
Now we’ll move on to create the answer function. This function will take the question that users input in the text box, pick a random response from a list of 8 possible outputs, and display it on the GUI. The first step we need to do is create the function and create a variable to store a random number. The first section of code for this step of the program will look like this:
Hint: Note that this code creates a variable called “num” which is used to store a random number from 1-8. Feel free to adjust the range of this number if you feel like adding additional responses!
As you can see in the code, we’ve started by defining the initial answer function, as well as choosing a random number. Now it’s time to use an if-statement to create responses depending on the number that is chosen. Here are a couple of ideas for responses to add to your program:
The code for this step will be:
Hint: Notice that each response is different and there is an even mix of affirmative, negative, and non-committal responses available.
Finally, we’ll just need to add in the text to display the response. OT do this, we will create a label and instead of typing the message, we’ll use the answer variable like so:
Step 4: Create the GUI’s ‘Download’ Button
Finally, we just need to add the ‘Generate Response’ button to the GUI, as well as a line of code to run the whole project. We will use the same basic formatting as was previously used for the labels and input box to create a button. Finally, we will use the root.mainloop() command to set up the program and allow it to be run. This command will essentially run the Python file and loop it forever, which means the program will always run. Once this final step is complete the code will look like this:

Hint: Note that in the line of code where we set up the Generate Answer button, the format is slightly different from that of the labels. This is because we added colour as well as padding and a command that will execute when the button is pressed.
Project Complete!
And now the project is complete! At this point, you will be able to experiment with the Magic 8 Ball program and get some exciting answers to your questions! Hopefully, you’ve enjoyed this beginner Python tutorial for kids, and if you’re stuck or have any issues with your code, try reviewing it again either in your text editor or by looking at the code mentioned above as a reference.
.png)


