
Introduction:
In this article, we are going to be using Python and the Tkinter library to create a fun quiz game that will allow you to compete against your friends in a trivia battle.

This project is a great way to learn more about making programs by teaching you how to use functions, if-statements, and many other essential programming concepts. This quiz program is the perfect way to build both your creative thinking and problem-solving skills.
Who is this Project For?
This is a beginner-level project for those who are new to Python. Before starting this project, you should already have experience with creating simple Tkinter GUIs (Graphical User Interfaces), functions, and if-statements. These are the concepts that you will use and build upon as you code this project.
What Will We Learn?
This program focuses on creating a GUI using the Tkinter library, which is used to display the GUI, as well as using JSON files to store data for the multiple-choice questions. You will also learn the basics of creating classes and functions to make the game run.
Features to Consider:
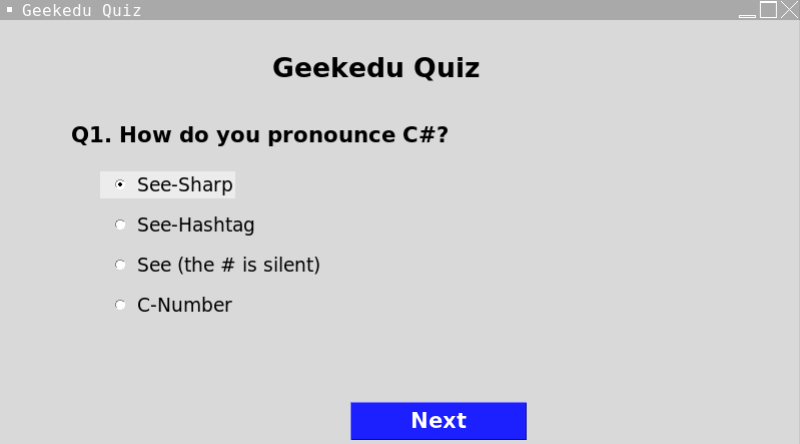
- A question will be displayed for players to see
- They can then click on one of four possible answers
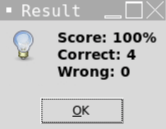
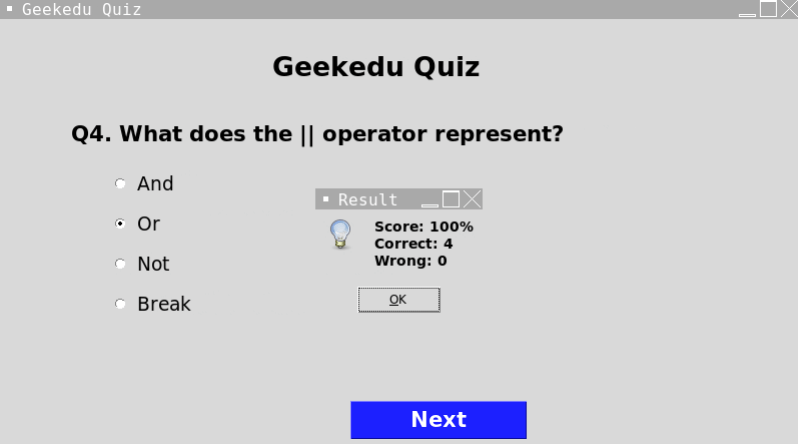
- At the end of the game, the score is counted and players see how well they did
Pseudo Code:
Here is the pseudocode for this project:
Import Tkinter and json libraries
Setup window as root
Set window size to 800x450 px and window title to “Geekedu Quiz”
Load a JSON file called data.json
Create variables to store the questions, options, and answers lists in the JSON file
Create a label titled Geekedu Quiz placed at (-100, 30)
Create a class called Quiz
Set the question number to 0
Call the displayQuestion() function
Set the selected option to the choice the user makes
Set the options to the buttons
Call the buttons() function
Set the dataSize to the length of the question
Set the number of correct answers to 0
Function displayResults(self):
Set the number of wrong questions to the number of questions-1
Display the number of correct and wrong answers
Calculate the percentage of correct answers
Format and display the results
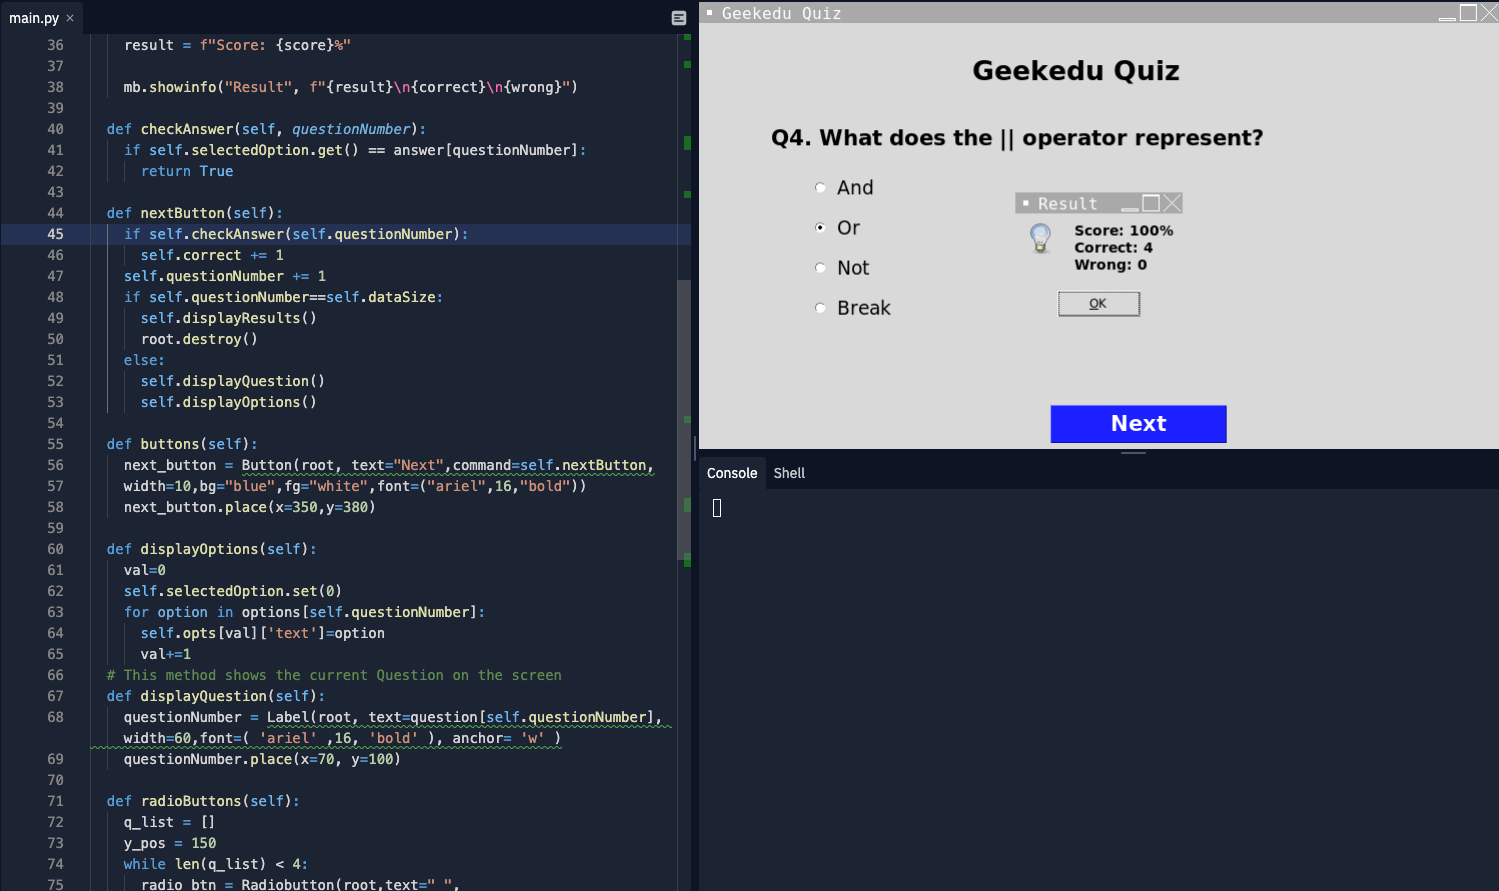
Function checkAnswer (self, questionNumber):
If the selected option equals the correct answer:
Return true
Function nextButton:
If the answer is correct:
Increment the counter by 1
Increment the question counter
Check if the question number is equal to the number of questions in the dataset
If so, call the displayResults() function
Destroy the GUI
Otherwise:
Call the displayQuestion() and displayOptions() function
Function buttons:
Create a button titled Next and place it at (350, 380)
Function displayQuestion:
Create a label to display the next question, call it ‘Question’ and place it at (70, 100)
Function radioButtons:
Initialize the list
Place the first button at a y-coordinate of 150
Use a for loop to add each option to the list
Place the button at (100, 150)
Increment the y-position by 40 pixels
Return the list
Run the mainloop
Main Steps:
This project can be broken down into 4 main steps:
- Import libraries and set up the window
- Create the quiz questions
- Create the Quiz class
- Create the main functions
Step 1: Import Libraries and Set Up The Window
The first thing we’ll need to do when creating this game is import all of the required libraries. For this program, we will be using the Tkinter library, the messagebox module, and the json library. We can import these libraries using this code:
Next, we need to set up the Tkinter window. We will initialize Tkinter, select dimensions for the window, and set a title. We will also link the JSON file to the Python file to allow the quiz questions to be used in the project. Finally, we will create variables to hold the questions, answers, and options from the JSON file. Once this has been done, the code is:
Step 2: Create the Quiz Questions
Now it’s time to create the questions and answers for the quiz. Start by opening the data.json file and adding the questions, options, and solutions there. Each of these will essentially be a list of values, and once complete, the code will look like this:

As you can see, these are the questions that we have decided to add for this quiz, but feel free to personalize it and adjust the questions and answers based on your interests!
Step 3: Create the Quiz Class
Now that we have finished setting up the window and creating the questions, it’s time to set up the Quiz class. This class will be used to run the quiz game. We will first start by adding a title to the window before we create the quiz class and call all of the functions that we will be creating.
As you can see, we will be creating 7 functions: displayResults(), checkAnswer(), nextButton(), buttons(), displayOptions(), displayQuestion(), and radioButtons(). In the next section we will go over how we can create these functions. For now, we will be adding two more lines of code, to run the program. These lines are as follows:
Step 4: Create the Main Functions
Finally, we’re on to the last step, which will include creating the game’s functions. We will start by creating the displayResults and checkAnswer functions. The first of these functions will calculate how many answers the player got correct, what percentage was correct, and will display these results in a smaller window. The checkAnswer function will simply compare the given answer to the correct one and will return true if they are the same. The code for these functions will look like this:
Now it’s time to make the nextButton, and buttons functions. The nextButton function controls how the program runs after the user presses next to submit their answer, and the buttons function formats this button. This is what the functions will look like once they’re complete.
Finally, we just have to make the displayOptions, displayQuestion, and radioButtons functions. Here is the code for these functions:
As you can see, the first two functions simply display the appropriate question and options, while the radioButtons function displays the buttons that are necessary to allow the user to select an answer. This was the last section of code for this project, so once this step is complete the project is done!
Project Complete!
Now the project is complete! We hope you’ve had fun creating this simple quiz game, and hopefully, you’ve learned more about programming with Python! Make sure to test your code now and see how it works. If you’re stuck or have any issues with your code, try reviewing it again in your text editor or look at the code included in the article as a reference.
.png)


