
Introduction:
In this article, we are going to be using Python and the Tkinter library to create a countdown timer. This project has a wide variety of uses and is a great introduction to making simple computer programs.

Projects like this allow students to practically apply the abstract concepts that they learn to create a final product. This countdown program is the perfect way to build both your creative thinking and problem-solving skills while making a functional computer program.
Who is this Project For?
This is a beginner-level project for those who are new to Python. Before starting this project, you should already have experience with creating simple Tkinter GUIs (Graphical User Interfaces), variables, and functions. These are the concepts that you will use and build upon as you code this project.
What Will We Learn?
This program focuses on creating a GUI using the Tkinter library. We will then create functions to allow users to set a countdown time and will start the countdown. These concepts are common to many coding-related projects, so completing this project will help you gain a deeper understanding of how they are used.
Features to Consider:
- Users will enter how long they want to set the timer for
- Once they press the start countdown button, the timer will begin
Pseudo Code:
Here is the pseudocode for this program:
<code>
Import Tkinter and time libraries
Setup window as root
Set window size to 300x250 px and window title to “Countdown Timer”
Create 3 string variables to store values for the hours, minutes, and seconds set on the timer
Set the values for hours, minutes, and seconds to “00”
Create an entry box called “hourEntry” and place it at (80, 20)
Create an entry box called “minuteEntry” and place it at (130, 20)
Create an entry box called “secondEntry” and place it at (180, 20)
Function submit:
Try:
Set the temp variable to hour*3600 + minute*60 + second
Except:
print(“Please try again”)
While temp >-1:
Divmod the temp value and 60
Set hours to 0
If mins>60:
Divmod the minute value and 60
Format the hours, minutes, and seconds
Update the GUI
Sleep for 1 second
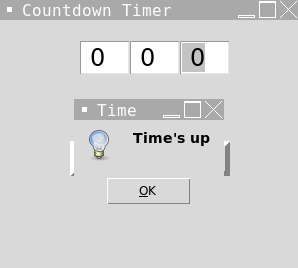
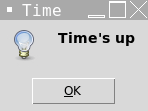
If temp==0
Create a new window to tell the user that time’s up
temp-=1
Create a button called “Set Countdown Time” with the command submit, and place it at (70, 120)
Run the mainloop
</code>
Main Steps:
This project can be broken down into 3 main steps:
- Import libraries and set up the window
- Create the GUI labels
- Create the submit function
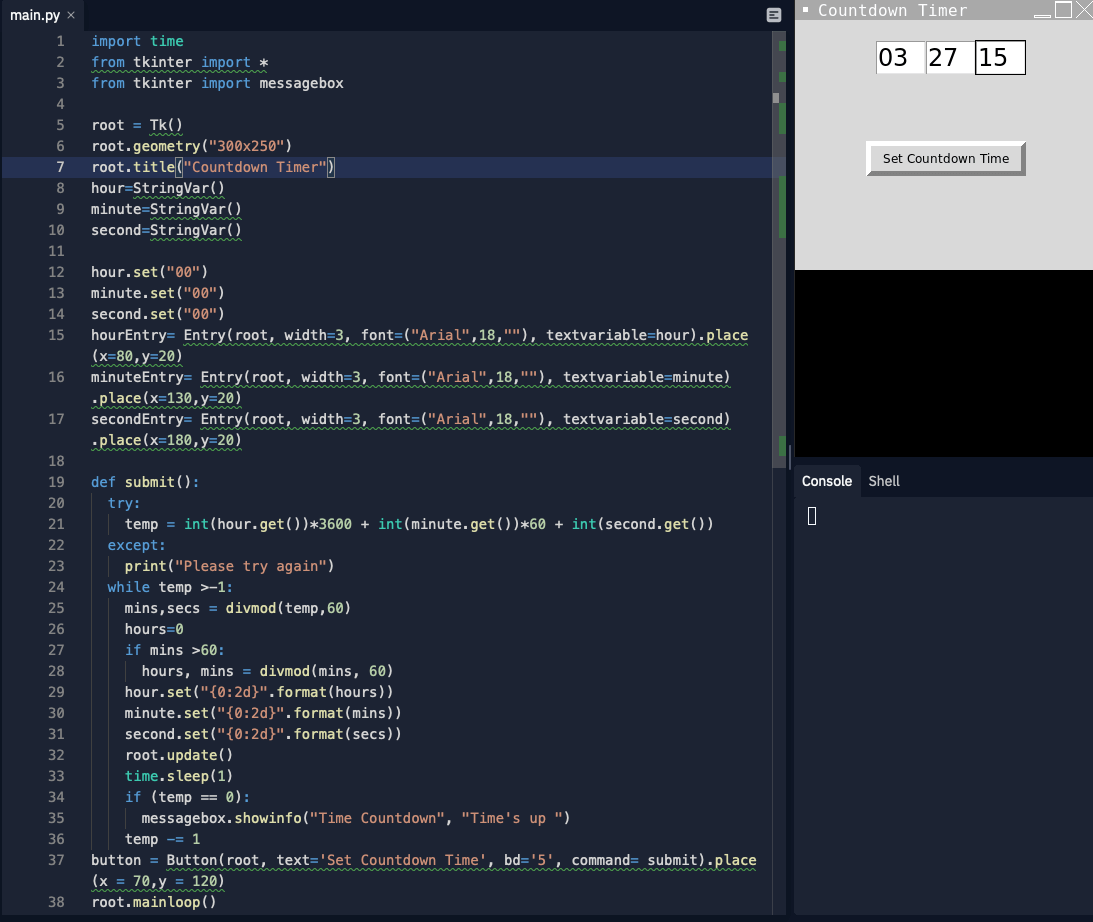
Step 1: Import Libraries and Set Up The Window
The first thing we’ll need to do when creating this game is import all of the required libraries. For this program, we will be using the Tkinter library and its’ messagebox module to create the GUI as well as the time library to encode and decode the messages. We can import these libraries using this code:
Next, we need to set up the Tkinter window. We will initialize Tkinter, select dimensions for the window, and set a title. In this step, we will also create variables to store values for the hours, minutes, and seconds that the countdown will be set to. Once this has been done, the code is:
Step 2: Create the GUI Labels
Now we need to set some default values for the countdown’s hours, minutes and seconds. For this example, we will be setting these default values to 0. This will ensure that if the user decides not to set a value for the hours the timer will not count down for any number of hours. The code for this section is as follows:
Next it’s time to create the labels and text boxes for the GUI. These will include a label and textbox entry for the message, key, and mode, as well as a text box to display the result.
Hint: Each label follows a very similar code format, so once you learn how to make one, it’s easy to make the others!
Hint: The format for a text input is as follows: Entry(root, font = 'font style', textvariable = variable name, bg ='background color').place(x-coordinate, y-coordinate)

So far we have labels, but no button to run the code. This will be created in our third and final step after we create the submit function.
Step 3: Create the Functions
Now that we have finished creating the main GUI labels, it’s time to create the submit function. This function is responsible for running the program by allowing the users to set a time for the countdown and also manages the time by counting it down each second. We will start by setting up the function and getting some values from the user input.
As you can see, we have used a try and except statement to get user input- if the user inputs values they will be added to the function, and if not, the user will be asked to input a valid value. Next, we will convert the minutes and seconds and store this value up to two decimal places. The code for this section is:
Now we just need to update the time remaining on the countdown and create the message for when the countdown ends.
As you can see we have made the timer sleep for 1 second before incrementing the time by -1. We have also used the messagebox method to create a popup window that will let the user know when the countdown ends.Now that this is complete, we’re done with the submit function! All that’s left to do now is to create the buttons and call the mainloop to run the program.
Finally, we’re on to the last step, which involves creating the button to start the countdown.
You’ll notice that each of the buttons follows a very similar format to the labels and text boxes we created earlier. We have also used the .place() method again to position each button. Finally, we called root.mainloop() to run the entire program from the beginning. And with that, this project is finished!
Project Complete!
Now the project is complete! We hope you’ve had fun creating this simple countdown timer, and hopefully, you’ve learned more about programming with Python! Make sure to test your code now and see how it works. If you’re stuck or have any issues with your code, try reviewing it again either in your text editor or by looking at the code included in the article as a reference.
.png)


