
Who is this Project For?
This is a beginner-level project for those who are new to Scratch. Before beginning, you should already have some basic experience with Scratch. This includes knowing how to create costumes, variables,
if-statements, and broadcast messages. These will be the core concepts used in this project.
What Will We Learn?
This project focuses on using knowledge of Scratch components like if-statements and broadcasting. By the end of the project, you will be able to use these concepts to create a fun and simple game.
Features to Consider:
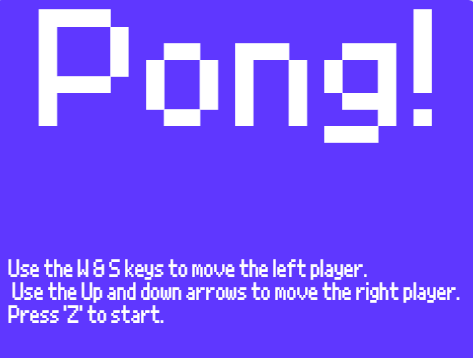
- The game has a start screen that will explain how to play
- When a specific key is pressed, the game will start
- Players can move their paddles using the keys
- If the ball hits the line on a player’s side, the other player gets a point
- If a player blocks the ball, it will bounce off toward the other player
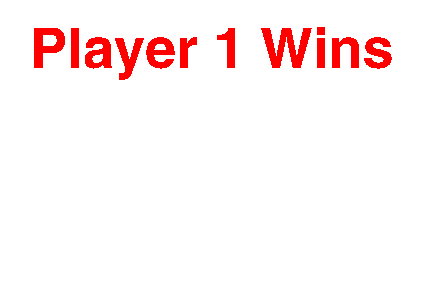
- When a player gets 10 points, they win
Main Steps:
This project has 5 main steps:
- Create the sprites and backdrop
- Make the ball’s start code
- Make the key pressed code for the ball
- Code the left paddle
- Code the right paddle
Step 1: Create the sprites and backdrop
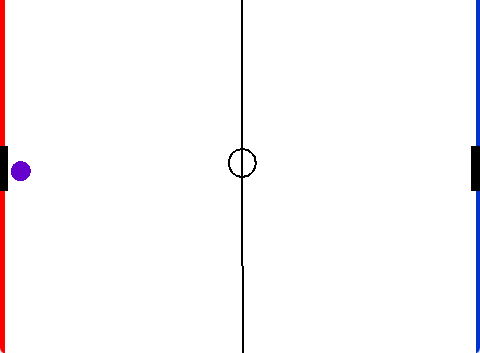
The first thing we’ll need to do is create all the sprites and the backdrop we need for the game. We will need to create two rectangular sprites as paddles and a round one to be the ball. The main backdrop will need to have a middle line, and two coloured lines to mark the back of each player’s side. We also need to have a start screen and a backdrop for when each player wins.
Hint: Putting the instructions on the start backdrop will be useful to let players know how to play the game.

Step 2: Make the ball’s start code
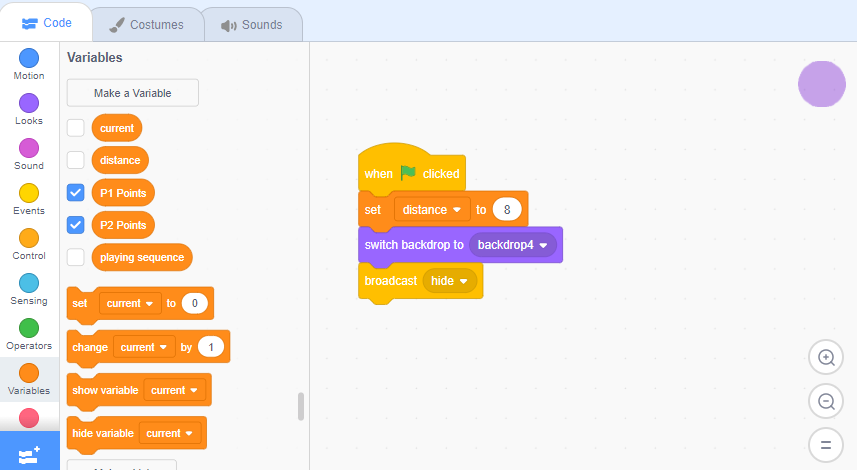
Once we've created our sprites, we can get onto creating the start code for our ball. The first thing we need to do is define what the ball needs to do when the green flag and ‘Z’ key are pressed to start the game. Let’s start with the green flag. We’ll start by setting the backdrop to our start backdrop. In this case, it’s called Backdrop 4. Next, we want to create our distance variable and set it to 8. This will be used to determine where the ball should be going. Finally, we will need to create a hide message. This will be used to hide our sprites and variables later.
Hint: It’s important to hide the sprites and variables on any backdrop other than the main game!
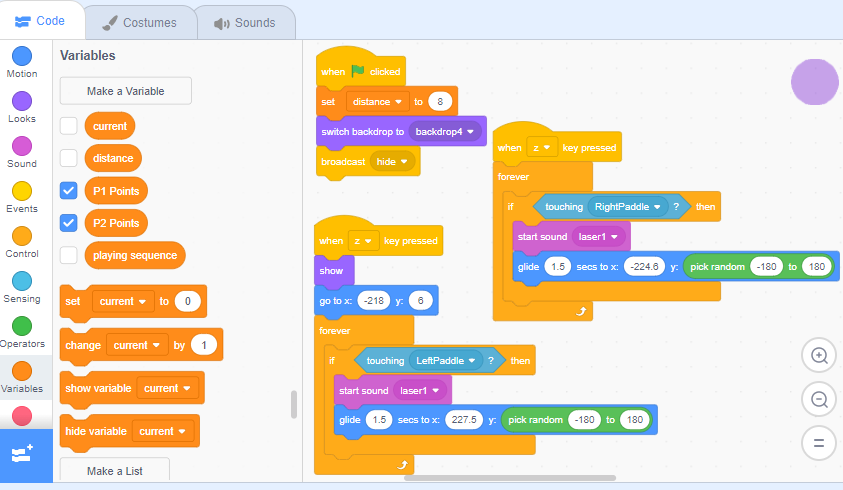
Now that we’re done with the green flag code we can start with the code for when the ‘Z’ key is pressed. To start, let’s drag out a block that says ‘when z key pressed’. Next, we’ll show the ball and set its coordinates to (-218, 6). This will place it in front of player 1. Now we’ll check to see if the ball is touching the paddle. We’ll use an if statement that says ‘if touching left paddle’. Inside we’ll add a block to make the ball go to an X-coordinate of 227 and a random Y-coordinate between -180 to 180.
Hint: try adding a sound block to make some fun sound effects when the ball bounces!
Now we’ll grab another ‘if z key pressed’ block and make the same if-statement underneath. We’ll change the left paddle to the right paddle to make it work correctly. In the end, the code should look like this:
Now it’s time to make the code that controls the points. We’ll start by dragging out two more of the ‘Z’ key if statements. Underneath, we’ll make a player 1point variable and set it to 0. Under that, we’ll add a forever loop that waits until the ball is touching the coloured strip at the back of the other player’s side. (For player one this would be blue). Next, we’ll make the ball go to (222, 6) and set the distance to 12.
Finally, we’ll increase the player’s points by 1 and broadcast our reset message. To count the other player’s points, we’ll duplicate the code and change a few minor elements. Rather than toughing blue and setting the distance to 12, we’ll check for toughing red and set the distance to 8. In the end, the code will look like this:
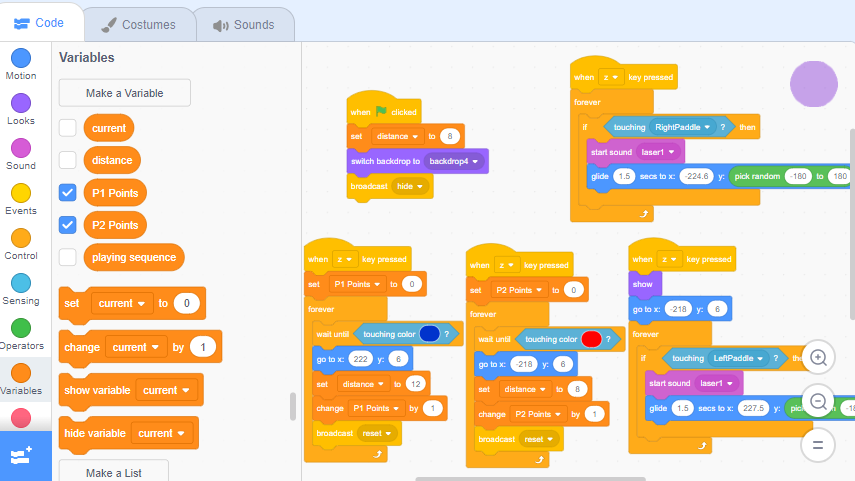
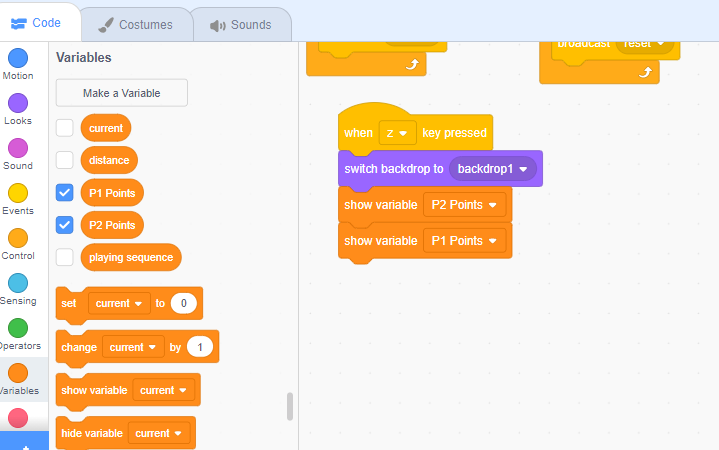
Finally, we only have one more Z command to code. To do this, we’ll grab the same ‘if z key pressed’ block and underneath we’ll change the backdrop to backdrop 1 and show the player points.
Hint: This block group will make the backdrop show the main game screen and player point count.
Step 3: Make the key pressed code for the ball
Now let’s move on to the other three commands for the ball. These are the sections of code that will control what happens when the Q or space bar keys are pressed. They will also control what happens when the sprite receives the ‘hide’ message. To start, we’ll work on the code for the Q key. Drag out an ‘if q key pressed’ block and an if statement. Then, we’ll check if the distance is less than 10. If so, the ball will go to (-224, 6). Next, the spacebar code will have the same basic blocks, except if the distance is greater than 10 the ball will go to (227, 6). Once completed, the code will look like this:

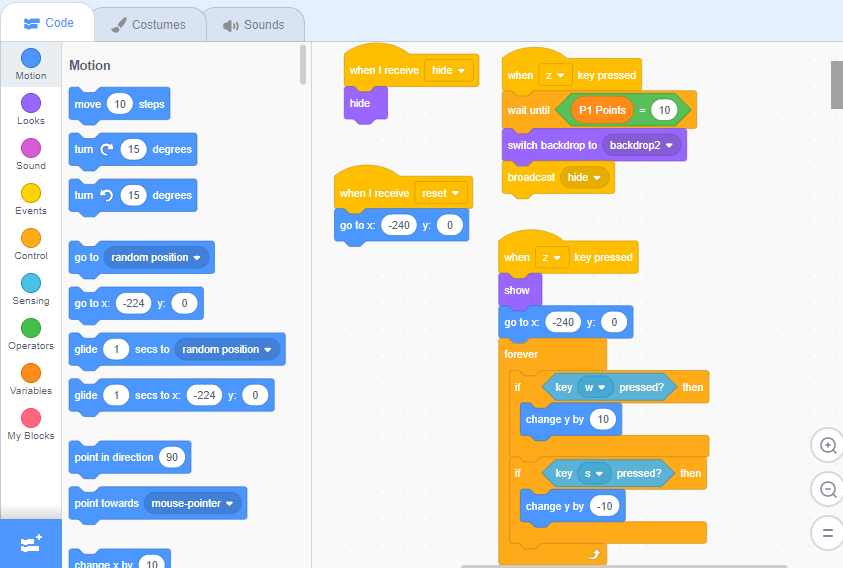
Finally, we have one more definition to make. When the ball receives the ‘hide’ message, we want it to hide both players’ points, goto (0, 0), and hide the ball sprite. Let’s do this by dragging out our ‘when I receive hide’ block and adding the blocks to hide the variables and sprite. The completed code will look like this:

Step 4: Code the left paddle
Now that we’ve finished the ball code we can move on to the paddles. We’ll start by adding the code to hide the sprite or restart the game. First, we’ll drag out a ‘when I receive’ block and select the hide message. Under this, we’ll add a hide block. For the reset message, we’ll simply add the message block and then add a block to set the position to (240, 0). The code should look like this:

Next, we need to define what will happen when the ‘Z’ key is pressed. To do this we’ll bring out two of the same ‘when z key pressed’ block we used earlier. Under the first one, we’ll add blocks to make the game wait until player 1 hasten points then change the backdrop to backdrop 2.
Hint: Remember to broadcast 'hide' to hide all the sprites when the backdrop changes.
Now we just need to make the paddle controllable with the keys. Under the second block we brought out earlier, we’ll start by showing the sprite and setting its location to (-240, 0). Now to make the paddle move, we’ll need to make a forever loop with two if-statements inside of it. In the first one, we’ll check if the ‘W’ key is pressed and change X by 10. In the second, we’ll check if the ‘S’ key is pressed and change X by -10. In the end, our code will be:
Step 5: Code the right paddle
Now that we’ve finished the left paddle, we only have the right one left! To do this, we can re-use some of our old code.
Hint: if you click on the backpack section at the bottom of the screen it will bring up a box where you can drag and drop code. This allows us to copy long code sections over to another sprite.
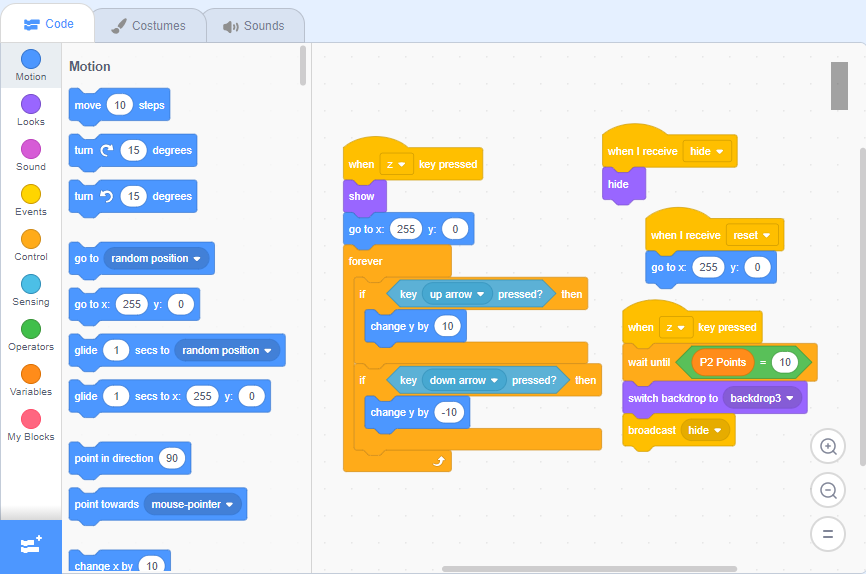
There are a few changes we need to make though. In our longer ‘if z key pressed’ and reset sections of
code, we need to change the location to (255, 0). This will make sure the paddle is on the right side of the screen. We also need to change the moving keys so that pressing the up arrow changes X by 10 and the down arrow changes it by -10.Finally, we need to adjust our points counter. We’ll change the code block so that it checks if player 2’s points are equal to 10 and if so it will change the backdrop to backdrop 3 instead of backdrop 2. Once we’ve done that we’re finished, and the code should look like this:
Project Complete!
And now we’re done! Feel free to test your game and see how it works. If you’re stuck or have any issues with your code, try reviewing it to see if you’ve made any mistakes, or check out the code shown above as a reference.
Keep Learning: Scratch Coding for Kids
Geekedu offers Scratch coding for kids that teaches beginners fundamentals in coding by making games. Outside of Scratch, we also teach coding courses for kids 8-18 in a variety of languages like Python, Java, C++, Animation and more.
Check out our online courses for kids, or contact our admissions team to learn which course is best for your student!
.png)


