
Introduction:
In this article, we are going to be using Python and its’ Turtle library to create a mother’s day greeting. We will use some very simple commands to create this encouraging and kind message.

This project can be easily customised to fit the individual you make it for, so make sure to add any changes that you want to the project to give it a personal touch.
Check the code on Repl.it : https://replit.com/@GeekEducation/Happy-Moms-Day#main.py
Who is this Project For?
This is a beginner-level project, and before beginning, you should have some previous knowledge of the Turtle library, such as changing directions, changing colours, and using the penup() and pendown() commands.
Features to Consider:
- The program will draw an image of a woman and include the text “Happy Mother’s Day”
- We will then draw three stars to the left of the image
- On the right side of the screen, we will include the date and a short message.

Main Steps:
This project can be broken down into 4 main steps:
- Set up the program
- Draw the image
- Include the message
- Draw the date
Step 1: Set up the program
The first thing we’ll need to do when creating this game is import all of the required libraries. For this program, we will be using the Turtle library to draw the greeting. We will also be setting up our Turtles and their colours. The code for this first step is as follows:
As you can see, we began by creating two turtles to make the artwork. Using two will make it much faster and more efficient to create this design. We set each turtle to a different colour, in this case, using violet to fill in the shape and black for the outline. Once this section is done, it’s time to move on and begin drawing the image.
Step 2: Draw the Image
Now we will draw the central image for our mother’s day greeting. We will do this using the code below:
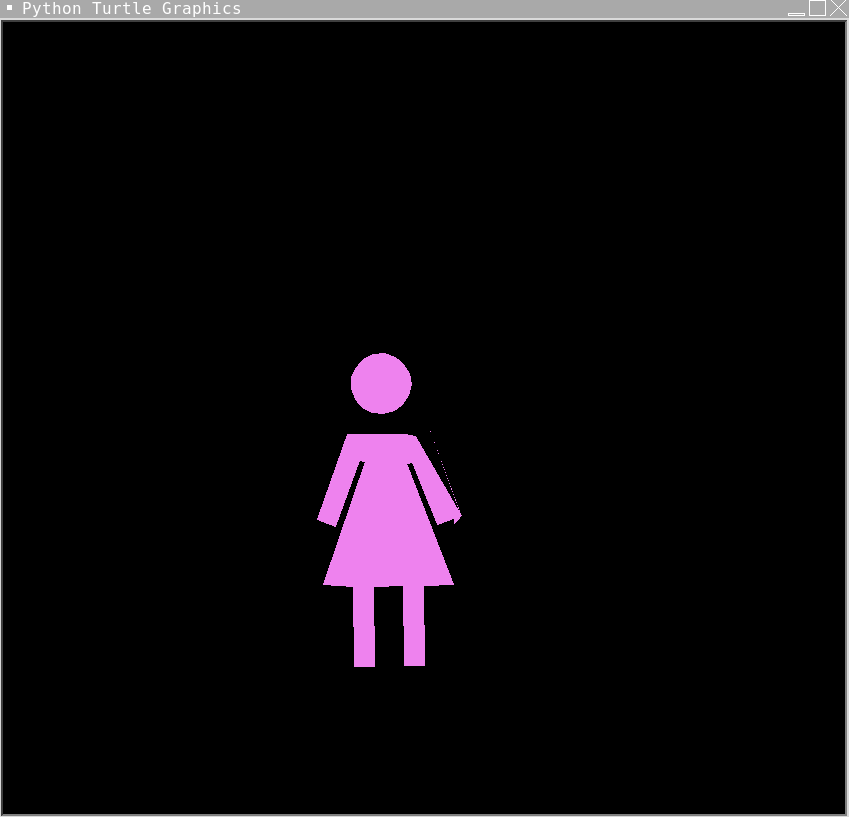
The code above draws the central image. Here is a summary of what each of the methods used above does:
- t.fd() moves the turtle forward the specified number of pixels
- t.rt() turns the turtle right by the specified number of degrees
- t.lt() turns the turtle left by the specified number of degrees
- t.penup() and t.pendown() control whether the turtle draws a line as it moves
Now it’s time to move on and create the code that will add the main text and stars to the image. This next section of code will be very similar to the previous code but will have differences in the angles and distances that the turtle travels.
Step 3: Include the Message
As mentioned above, we are now onto the step where we add the Happy Mother’s Day message and stars to the program. The code is included below, and an explanation of what it does can be found below:
As you can see, this code begins by creating four multicoloured stars on the left side of the screen. It will also write Happy Mother’s Day, using the head of the person we drew earlier as the “O”. Finally, the code will include the message “Thinking of you, and hoping you have a beautiful day, from the staff of Geekedu”. You are welcome to change this message however you would like.

Python Monther's Day Greeting Card
Step 4: Draw the Date
Now we’re onto the final step, which involves creating the date and adding it to the canvas. This will use similar code to the previous steps, and will also include two extra lines at the end of the project’s code to wrap up the project. The code for this final step of this Mother’s Day project is as follows:
As you can see, we used the turtle to draw the number 8 (to represent May 8th). We then added text to include the month of May and added a fill and an outline. Then, we hid the turtle and allowed for the program to be exited on click. With that, we have finished all of the code and the project is now complete!
Project Complete!

Now the project is complete! Make sure to test your code to make sure that it works, and make any changes if needed. If you’re stuck or have any issues with your code, try reviewing it again either in your text editor or by looking at the code included in the article as a reference. We hope you’ve enjoyed creating this Mother’s Day Greeting project, and hopefully, you can use it to encourage your mother on this special day.
.png)


